
Custom Painting Cabinets
If you are a Do-it-yourself kind of person, here are some things to consider before remodeling your kitchen and painting cabinets; suggests, step-by-step painting process, and materials needed for the job.
Should You Replace or Re-do Your Cabinets?
Are you tired of looking at the same drab cabinets every time you walk into your kitchen? If so, then it is time for a change. But, first you need to consider a few things before making your decision on what would work best for you. If you don’t like the layout of your kitchen and a new cabinet installation would fit into your budget, then that is the best way to go. This way you are not spending money on new cabinets just to be unhappy with them later on. If you are keeping your existing cabinets, then you can re-face them, strip and re-stain them, or paint them. The condition of your cabinets may also determine which option is best for you. Sometimes wood cabinets may have water damage, usually around the sink base, gouges, cracked doors, or a peeling clear finish.
Refacing
Refacing a cabinet is done quickly and conveniently if you use a professional installer. A thin sheet of veneer is adhered to the boxes and new doors and hinges are changed out to give your cabinets a new look. I would not recommend stripping and staining. It is very labor intense, messy, is generally a recipe for disaster if you do not have the experience or knowledge. Generally, the most cost effective way to re-do your cabinets is to by painting cabinets.
Custom Painting Ideas
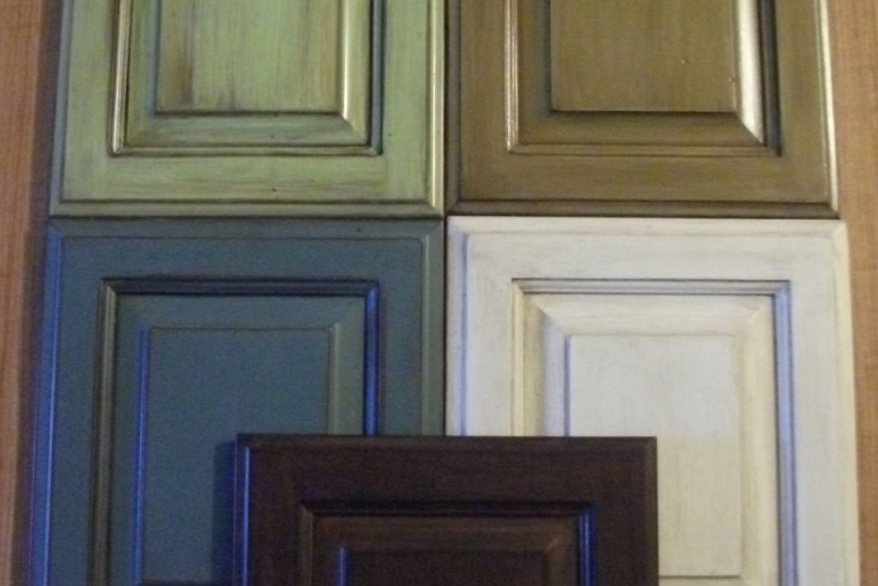
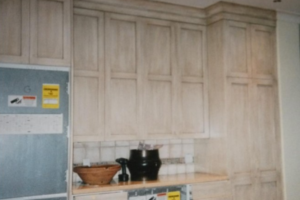
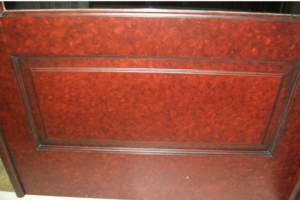
When choosing a painted finish you can go with one solid color to create a simple clean look or you can opt for a more creative multi layered faux finish. Faux simply means fake or made to look like something real. Applying a wood grain or a marble pattern on a solid paint color would be considered a faux finish. If you decide
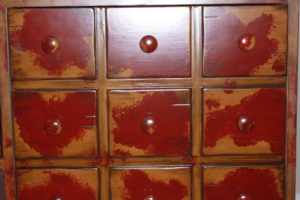
to go with a layered look for your cabinets, the sky is the limit to what you can create. Just remember you want it to last years so don’t go too far in your creative style and end up getting tired of them. You will have a harder time coordinating them with any color changes you may want to make for your walls later. A good rule of thumb is “less is more” or use “a little of this and a little of that” approach when you start painting.
Here are a few examples of layered applications you may want to add:
- Rubbing off edges of doors, molding, and corners of cabinets
- Creating worm holes, small indents or superficial gouges
- Applying a different color to second or third coat
- Applying thin glaze over last coat of paint
- Brushing a small amount of crackle randomly before applying first or second coat of paint
First Steps for Custom Painting Cabinets
- Clean off cabinets with warm soap and water.
- Dry thoroughly. I clean them lightly with odorless mineral spirits to reduce any previous contaminants ie. cleaning products, or grease.
- Remove hardware, hinges, doors and drawers and try to find a place such as your garage to work on them if possible.
- Tape off any areas you don’t want to get paint on of course. Lightly sand with 220 sandpaper or use a de-glossing product to create a scratch surface. This creates the bond for the paint to hold.
- Prime with an oil base primer. Some are tintable. That helps bring the color closer to the first coat for better coverage. Make sure the primer has a stain blocker in it. It will help prevent any unseen contaminants from trying to bleed through the paint.
- Sand with 220 or 320, depending on how smooth you need to get it, before applying first paint coat. Wipe off all powder from sanding.
- If you like a distressed look, find a rock from your garden with some varied edges and use it to randomly hit the cabinet while turning the rock to create desired effect. Don’t worry! You can’t ruin them if you like the aged look. It really does create more dimension to the finish.To create a two color rub-off finish, you apply the first coat in a contrasting color of your choice.
Painting Steps
- Then apply next two coats with another color of your choice. When applying 2nd and 3rd coat, stay away from the edges some so you won’t have to sand off as much paint. Do not sand too hard. You want to make sure the first contrasting color stays on the finish.
- For the glaze, you can use an oil or water base glaze. This gets a little tricky. Use nitrile gloves!!! They are stronger than latex and will protect hands from the paint products. Fold a t-shirt like rag into a square and wet it with mineral spirits or water first. It depends on whether you are using a solvent or water base glaze. Never mix the different products together! They are not compatible!
- Brush some glaze onto the rag and wipe down the cabinets and doors. Apply as desired. Smooth it out with a clean folded dry rag. Highlight the inside of the doors with a small brush. This affect gives the cabinets more depth to make them, “Pop”. To help clean up the lines, lightly smooth them out with a cheap chip brush. If using oil base glazes, don’t touch them for 2-3 days to let in cure for best results. A water base glaze should only need 24 hours to dry.
- Always apply a clear satin or semi-gloss polyurethane to seal the finish. I recommend using a spray can of clear for first coat. This will prevent the glaze from moving. If you are brushing on the second coat, always use the best quality brush available. This will reduce brush marks. Sealing your cabinets with a clear coat product will keep all of your hard work protected so you can clean them later.
-
Example of glazing, distressing, and painting cabinets for a kitchen
Final Tips
Water base products are more environmentally friendly, have less odor and easier clean-up. However, they are harder to manipulate. The other option is to hire an experienced licensed professional, but that can be expen
sive. Definitely play with the process and the products before you take on the project so you can get a good feel for materials. It is best to use a test board or the backside of one of the doors first. Finally, adding decorative hardware to your cabinets will give them a personal touch that will pull the project together. There are many styles of knobs and pulls with different finishes to choose from so shop around and make sure it is exactly what you want. Start out with a small project and have fun with it!

Leave A Comment