
Painting and Distressing Furniture
Painting And Distressing Furniture
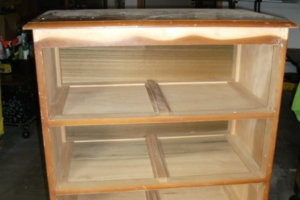
I picked up this dresser along with a few other items at a storage locker auction for only $10.00. It is probably dated from the 1960’s – 1970’s. The finish was dull and scratched and the top drawer was broken and jagged across the top of it. The structure of the drawers were in great condition and built with dovetail joints. The original design of the dresser had a sculptured wooden strip across the top and at the feet. I personally didn’t like the wooden strips so I decided to remove them. It was a perfect painting and distressing furniture project. Here are instructions on the painting and distressing project.
Materials
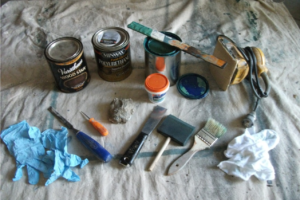
- Drop Cloth
- Two Colors of Latex Paint – 1 quart ea.
- Stain
- Minwax Fast Drying Polyurethane Clear Satin Finish
- Elmer’s Carpenter Wood Filler
- 2″ Foam Brush
- 1 1/2 -2″ Disposable Brush
- Putty Knife
- Rock
- Nail Set
- Chisel
- Gloves
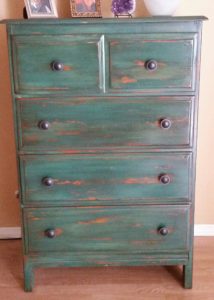
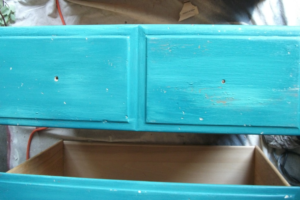
Dresser after painting and distressing furniture project - Rags
- 220 Sand Paper
- Palm Sander
The Process
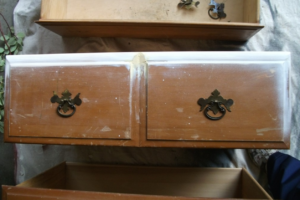
The best way to remove the strip is to stick a putty knife between the strip and the dresser box. Continue to tap the end of the knife with a hammer. Keep pulling it back and forth until it comes off. Remove the hardware and set aside in case you decide to use them again for this project or a future project. Clean the surface of the dresser with light soapy water, then rinse and dry. This will remove any dirt and grime. Fill any unwanted holes with wood filler and sand smooth when dry.
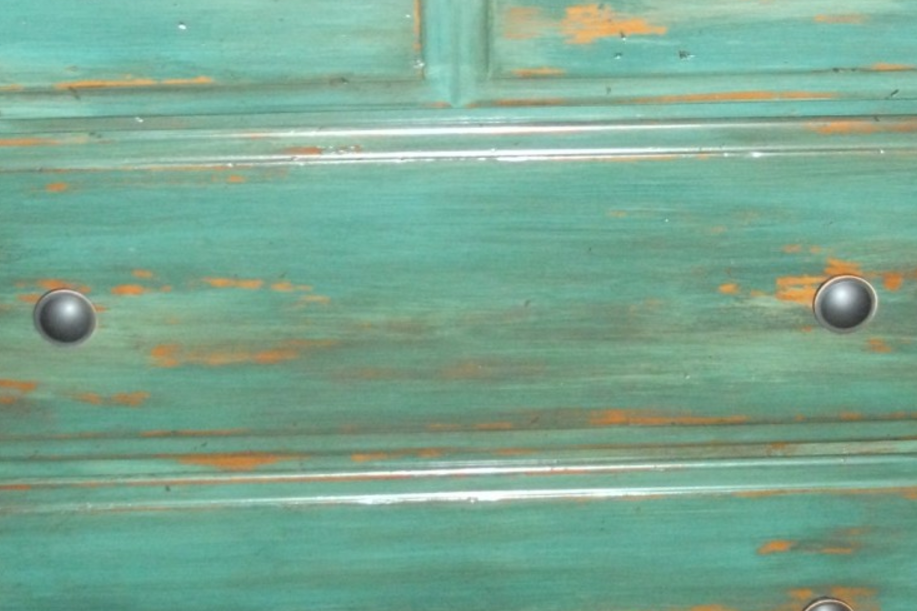
Distressing the Surface- I like to use 3 different tools to distress my surface; a rock with different edges on each side, a nail set for worm holes and a chisel to create wear on various edges of the drawers and dresser. First use the nail set to create random worm holes on all areas. Cluster some holes together in different areas to give it a more natural occurring pattern. Using a rock, hit it randomly over the wood. Turn the rock as you go to create different shaped markings. This can be done before or after applying the base coat.
Applying Base Coat
I used two different shades of blue with similar tones so that the colors would blend well together. Apply one color of paint to most of the surface and the other color around the hardware area and in various places. Always paint in one direction with the natural grain of the wood. Allow paint to dry overnight. Sand with 220 grit sandpaper using an electric palm sander to knock down rough edges, corners, and chiseled marks. Randomly, sand off some paint to give it an aged and worn look..
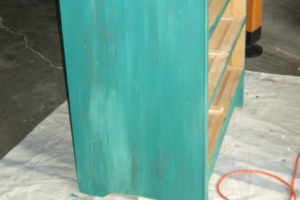
Applying Stain- Using a soft rag, wipe on stain of choice, over the whole dresser. Wipe of most of the excess stain with a dry rag. I like to use a dark walnut finish because of it’s color tone. Make sure to wipe stain on and off in one direction so it doesn’t look just plain sloppy. It should look aged, but neat and clean. Allow stain to dry overnight.
Applying a Clear Finish- Apply 2-3 clear coats of clear satin finish to seal in the finish and give it a nice polished, but not shiny look. Allow finish to dry between coats. Replace the hardware with the old or get new ones with a whole different style.
About The Author
Jennifer Thibodeaux
Related Posts

How to Spray Paint Wood Furniture
Do you have an old dresser, or other wood furniture you want to paint and…
February 3, 2019
Leave A Comment