Do you want to make a chalkboard with cute phrases, motivational or inspirational messages to add a nice warm and welcoming touch to an environment? It is a popular way to market menus at cozy gathering places like small bistro’s, cafes, and coffee shops. It is also an inviting, eye-catching way to make a statement for your home.
I have been wanting to create some inspirational messages in my home, but not sure how to do it. After looking at a few Pintrest ideas, I came up with my own simple version. After pondering what message I wanted to write and what I wanted to put it on, I happened to find something while on one of my thrift store treasure hunting trips. It was a brand new chalkboard with a nice barn wood frame. It was perfect!

Creating a Message
First we need to create the message. It is easiest to create and edit a document in Microsoft Word. There are so many fun and whimsical fonts to choose. Experiment with a variety of different fonts and sizes that you would like to see on your board. Adjust the sizes of the fonts until your cover the amount of the surface you will cover on your board.
Materials
- Chalkboard
- White Graphite Paper
- Mechanical Pencil
- White Color Pencil
- White Chalk
- Scissors
- Simple Green
- Rag

Layout to Make Chalkboard
After you create the design you want, cut out the letters and place them onto the graphite paper. Secure the in place with a small piece of tape away from the letters themselves. This will help prevent the letters from slipping. You will also need to tape the graphite paper to the board to keep it in place.
Tracing the Letters
Use a sharp pencil to trace the letters. I prefer to use a mechanical pencil to achieve small details. Help keep the paper secured by holding the ends of letters down with your other hand.

Finishing the Details
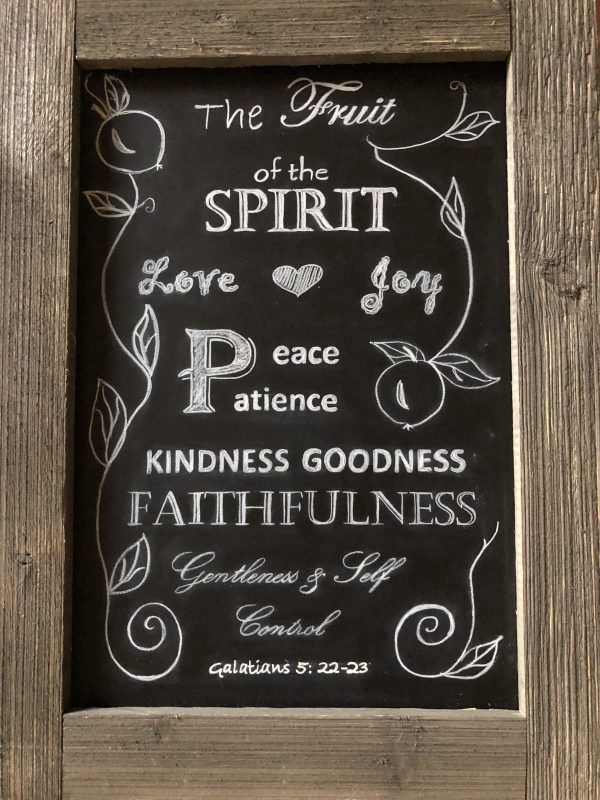
Once you remove the paper, you will be able to see any areas that did not go through the paper. The marks from the graphite paper will not smudge. The beautiful thing about using a white color pencil is that you can get a sharper line and finer details. It doesn’t get smudges while you are working on the details. * When you compare at the picture of the traced letters with the layout of the letters, you will see I made some changes. I did not like where I place the word patience next to the letter P. I remove the word with some Simple Green applied to a rag then rubbed it off so it was clean. Soap and water didn’t work as well. After it was dry, I moved the word closer to the letter P.
Design Details
Once the letters are highlighted with a white color pencil, you can use the remaining space to create a design by freehand or using the same tracing process. *I used a piece of white chalk to freehand draw a design to fill the space. After I completed the design, I used the white color pencil to trace over it. Once it is complete, wipe the board gently with a damp rag. Use Simple Green on a damp rag and apply it to smudged areas that are hard to remove.
Faux Paint Stone Finishes
If you have ever wanted to know how to faux paint stone finishes, but your not sure how, I will give you some basic steps to get you started.
Specialty faux finishes have been around for centuries, but are sometimes subtle. Other times they are used to create dramatic effects. They are applied to walls, furniture, light fixtures, even in set designs.
Particularly, Faux painting techniques are used to create the illusion of images, textures, and natural surfaces. In spite of trends, there are always useful ways to apply faux painted finishes to your home.
Apply the following techniques to your walls, floors, home accessories such as, mirrors or picture frames, or furniture. With this in mind, enjoy the complete one-of-kind look you will create for your personal space.

Materials Needed
Before you gather your paints, keep in mind that you don’t need to have exact colors. Pick colors you would find in a sample piece of stone. Consequently, you will achieve the necessary colors during the blending process. Overall, your colors will depend on the type of stone you want to create. Importantly, coordinate then with the area where they will be applied. For example, I used six main colors.
- Buy flat paint ( deep gold, chocolate brown, antique white, stone gray, cream white, bisque white)
- Use only cotton t-shirt rags
- Purchase only 2 in. & 4 in. throw away brushes
- Use small artist brushes for details
- Bring foam or plastic plates (apply paint and water to plates to dab colors and thin paint for blending technique)
- Lay down drop cloth
- Apply only blue tape
- For easy prep, use painters paper or plastic
- Don’t forget stir sticks

Preparing the Area
- First, cover surrounding walls with painters paper or plastic and blue tape. (Blue tape is less tacky and will be less likely to peel paint).
- Cover floor with drop cloths.
- Set paints aside in a place where you can move back and forth to various colors.
- Set a bottle of water aside to easily dilute paint when needed.

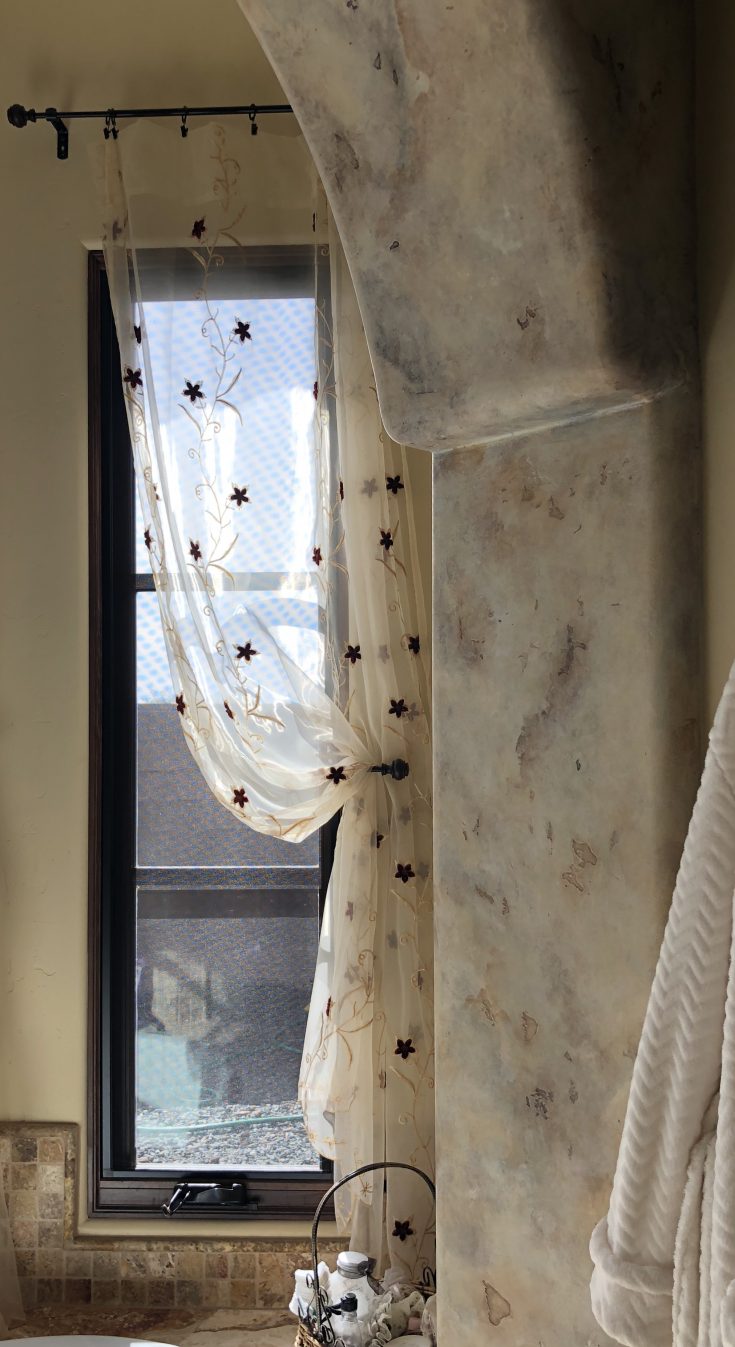
Techniques for How to Faux Paint Stone Finishes
- Paint the smallest part of the space first in order to get your momentum going.
- Apply the darker paints first with a large brush. Do not leave brush strokes.
- Dab and pat in gaps with softer colors using a damp cotton t-shirt rag. Overlap each color and blend the edges of the paint into each other. Don’t overwork the paint. For this reason, you will pull away the recently applied layers which creates light spots.
- Cover the entire wall with paint.
- Allow painted surface to set overnight so paint dries entirely.
- Dilute lighter colors and randomly apply to all areas that need to be blended into each other. Keep in mind, you want to create a softer more natural look.
- Create veins by pushing one side of the rag into the surface. Then blend into the finish.
- Create fine lines with a small artist brush. Blend with a lighter or darker color on one side of the line.
Painting Tips
- Keep the base color of the wall the same to save time and money.
- Use the same paint that is used on the adjacent walls as one of the faux paint colors. With this intention, it helps keep the colors coordinating with the rest of the room.
- Frequently, stir paint to keep color consistency and prevent it from drying out.
- Clean up the edges with a small artist brush after the paper and tape is removed.
Check out this example: